external links:
 Embedded Artists
MyElectronics
27 January 2010: LPCXpresso Finally something new to show.
I was used to the command line Quickstart Development environment, but the LPCXpresso is delivered with a complete Eclipse environment with a real JTAG debugger solution from
Code Red Technologies. Create, build and debug your code from within one graphical environment.
The LPCXpresso is a joint development of NPX, Code Red and Embedded Artists in which all parties contributed there specialties. LPCXpresso gets you up&running in a few minutes and developing your own code within a day. |
|||||
31 January 2008: CMC milling machine After some parts hunting we finally got all parts needed to build the CNC milling machine. Not completely electronics, but next to a PC with EMC2 there will be some electronics involved to get the thing fully operational. Here are a few videos of the first milling actions from youtube
These movies were shot during building, as can be seen from the rubber-band mounting solutions. A piece of 80x80mm aluminium profile is attached to the Z-axis using two small bolts, if things go really wrong these will (hopefully) snap before real damage appears. The hole in the balsa wood in the right movie was a first attempt of the machine to kill the Dremel spindle by pushing it through the table. The dremel twitched, crunched and moved but both dremel and the tool bit are still alive. These first tests look promising, even though the supporting 5mm alu sheets on the portal have not been mounted the machine is very stable and repetition accuracy is 0.01 mm when travelling from extend to extend at full speed.
| |||||
16 March 2007: New Yahoo group
| |||||
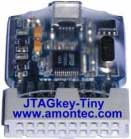
14 March 2007: JTAG debugger pod My evenlasting quest for a JTAG pod has almost ended. I received some ft2232 chips and started to look at this myself.
| |||||
11 March 2007: Using the LPC2468 OEM board VMware player I should start explaining that all Linux development is performed from a Linux distribution. The VMware player I mentioned yesterday is needed for this. This creates a virtual PC within your PC and on that virtual PC Linux is run. Don't get scared if you have never seen Linux before, it is all pre-arranged by the Artists themselves and there are some nice introductions on how to setup and run the whole thing (since I am a Linux user from the old days I may be incorrect, there may be some steps missing which are really needed). Hello World! uboot and another example The other programs I tried are the tcp_client and tcp_server. The tutorial shows how to create programs that are stored on the ROM file system. At the same time you are getting to use uboot (the boot loader) to download the images from the PC, using a TFPT server that is built in the PC-Linux system. This means that you can develop and test your programs (including the Linux kernel and drivers) without having to touch the flash on the board. MMC/SD card The uClinux also supports the MMC/SD card so you can also store your programs on the MMC card. Booting from MMC is also possible but there are some problems in this field. On the board I used this will only succeed about 50% of the time and that is not good enough for me, booting must be a stable process on which one can rely. Hello Embedded Artists! I thought it would be nice to let them know my first steps with the board and I wrote them an email explaining things. I mentioned that some information is missing from the support pages, also mentioned that most of it is OK, and the problems I have with SD card in uboot.
| |||||
10 March 2007: The lpc2468 OEM board from EmbeddedArtists has arrived
| |||||
1 March 2007: JTAG debugger pods
Another solution may be the ARM-USB-OCD from Olimex. For € 69,95 you get a multi-function pod that will provides the JTAG, RS232 and power to your target. But somehow I am not a real Olimex fan ... | |||||
15 August 2006: More than Chess
The chess game is now on the support pages of Embedded Artists. I continued with a development system with an lpc2106 QSB connected to the LCD. The LogicPort Logic Analyzer is used to monitor the I²S signals. | |||||
The photo shows the connetions from the LCD towards the lpc2106. The jumper that connects to the RESET line (I placed those at the bottom of the board) is connected to ground. With the LPC2104 in reset all I/O pins are set to high impedance such that the lpc2106 board is in control. | |||||
Close-up. From top to bottom: P0.25, P0.6, P0.4 and P0.24. The 180 E resistors convert the 3.3V into 3.1V (the operating voltage of the lpc2104). Gives me the ability to check my large fonts before programming this into flash. | |||||
3 August 2006: Let's Play Chess
About two weeks ago my LPC2104 Color LCD Game with Bluetooth board from Embedded Artists arrived. This is real summer fun but it was just too hot to do much on this little target. I'm still working on a graphical user interface but when it's complete (somewhere this week) it will be available from the Embedded Artists support pages. | |||||
16 December 2005: Quest for JTAG debugger pod If you are looking for a JTAG debugger, have a look at openocd.berlios.de. This is an open On-Chip Debugger created by Dominic Rath, part of it is an ARM7/ARM9 debugger for his diploma thesis - a very fine description of what is needed to create an ARM7/9 debugger.
| |||||
15 December 2005: Prototyping board The QuickStart Modules from Embedded Artists are now acompanied by a prototyping board. The modules sit on top of this board so you can prototype and program your application and plug it into the final product when finished. A nice board with keys, LEDs, SD/MMC slot and more. There is only one problem, if I need both RS232 ports my standard RS232 cables do not fit. Either use other cables (e.g. flatcables with matching connectors) or cut a piece from the plastic ...
| |||||
7 October 2005: Quest for JTAG debugger pod There are lots of debugger pods for the ARM series. There are the Wiggler, the ARM USB CrossConnect or even the Trace32 (often just called the Lauterbach). I don't like the Wiggler, it's depending on the PCs hardware too much and a Trace32 is way to expensive. A CrossConnect would be a fairly cheap solution but alas: It only works with their own debugger ... (and I'm defenitely using both Gnu and RealView). There is still another solution. Just wiggle the JTAG lines on the lpc21xx using another lpc21xx so I asked around on the lpc2000 yahoo group. Responses - up to now - point to either an parallel port PCMCIA module or products that still bare a TBD stamp. After a few hours of digging through jtag information and a bit of programming I am now able to wiggle the jtag lines and get some information out of it.
| |||||
4 October 2005: Prototyping board from Embedded Artists I just got a mail from Embedded Artists yesterday. They introduced the Quickstart Prototype board.
This just means that I can stop with the efforts for my own development board, this board will do most of the job that I need today. | |||||
2 October 2005: New board from Embedded Artists 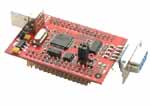
Today EmbeddedArtists announced the new LPC2148 QuickStart board on their website. At an introduction price of € 41,- this board with USB is a real must-have. Better order more when you visit their web shop. | |||||
1 October 2005: Timing your programs (1) Timing is always a point of attention in embedded programs. If you are running a 8051 on 1 Mips or if it's the LPC2106 running alomst 60 Mips, at a moment in time you will meet its limitations. Measuring time critical parts of your code is one way to make sure that the application will not run into timing problems and knowing where timing problems arise may help solve them. In this series of articles a number of examples will show how you can measure timing without the need for expensive ETM equipment or other external equipment. Part 1 shows how the basic timing measurement using an internal timer is set up, the next part will introduce timing measurements in interrupts. | |||||
30 September 2005: Specs for development board I'm more and more convinced that the QuickStart Boards are the way to go for rapid development so I requested LPC2138 and LPC2148 QuickStart Boards. I need a better development board that the current breadboard with the LPC2106 QSB so it's time to collect some requirements for the board. Meanwhile I discovered USB Snoop a USB sniffer that logs all communications to the USB hardware under Windows | |||||
25 September 2005: In embedded systems it's all about code size In most embedded devices memory space is limited, the LPC2106 has only 128 kB Flash where the LPC2138 has got 512 (but only 32 kB RAM). Whatever memory size, you will eventually run into its limitations. Therefor you should optimize your code. The LCD test program has a code-size of 7747 bytes and with some easy help you can get this down to 7195 or even 6563 bytes of code. | |||||
20 September 2005: Test progam for LPC2106 QSB connected to LCD key I have to provide some photo's, I needed to test some keys that come with an LCD in the key and needed a test progam for this. Since the 10/100 MBit Ethernet QSB does not provide I2C signals on the connector I used the LPC2106 QSB. The program uses the I2C to communicate with the LCD and PWM2 is used to generate the (negative) LCD contrast voltage. I've also adapted the startup environment from Embedded Artists to allow downloading of a program to RAM using the bootloader. This is not supported by the standard lpc21isp program, you will need the new version I created (.exe only) | |||||
17 September 2005: First specs for QuestControl
A LPC2106 QSB is the first target for the system, although I am already short on I/O options but taking an LPC2138will not solve the problem: I need multiple PWMs but two PWMs share pins with UART0 and a third is shared with the SPI port for the SD card interface. It's most likely I have to multiplex the IO functions, the UART will never be used at the same time as the front/rear light, either the cadance sensor or the SRM power meter are used so these can use the same GPIO pin and it will be likely that there are more functions that may combine pins. With the option for a parallel LCD all 32 IO pins are used. | |||||
16 September 2005: Execute programs from RAM on the LPC2106 QSB I've been working on some changes in the Flash download program and the startup code provided by Embedded Artists to allow program execution from RAM. This gives a cheap and easy way to quickly test some design ideas when no JTAG debugger is available without wearing out the flash. | |||||
|
15 September 2005: new LPC21xx boards from Embedded Artists
QSB stands for QuickStart Board and it made the promisses come true!
Both boards come with a test program in Flash, just hook the board up to your terminal program, some LEDs to the IO ports on the LPC2106 and a network cable to the ethernet board and you can see the board working.
| |||||
14 September 2005: Forth interpreter for ARM IN my search for ARM boards I also discovered there is a free Forth interpreter for the ARM, provided by Frank Sergeant | |||||

 A long time ago I ordered the FT2232 chips to build a
  For long I have been wanting to build a bicycle computer that measures and stores data. My Quest, a faired recumbent, also needs indicators. A nice opportunity to combine different functions.
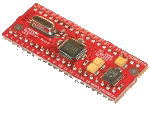 Last week I finalized my search for a development board with a LPC2106 microcontroller. Not the